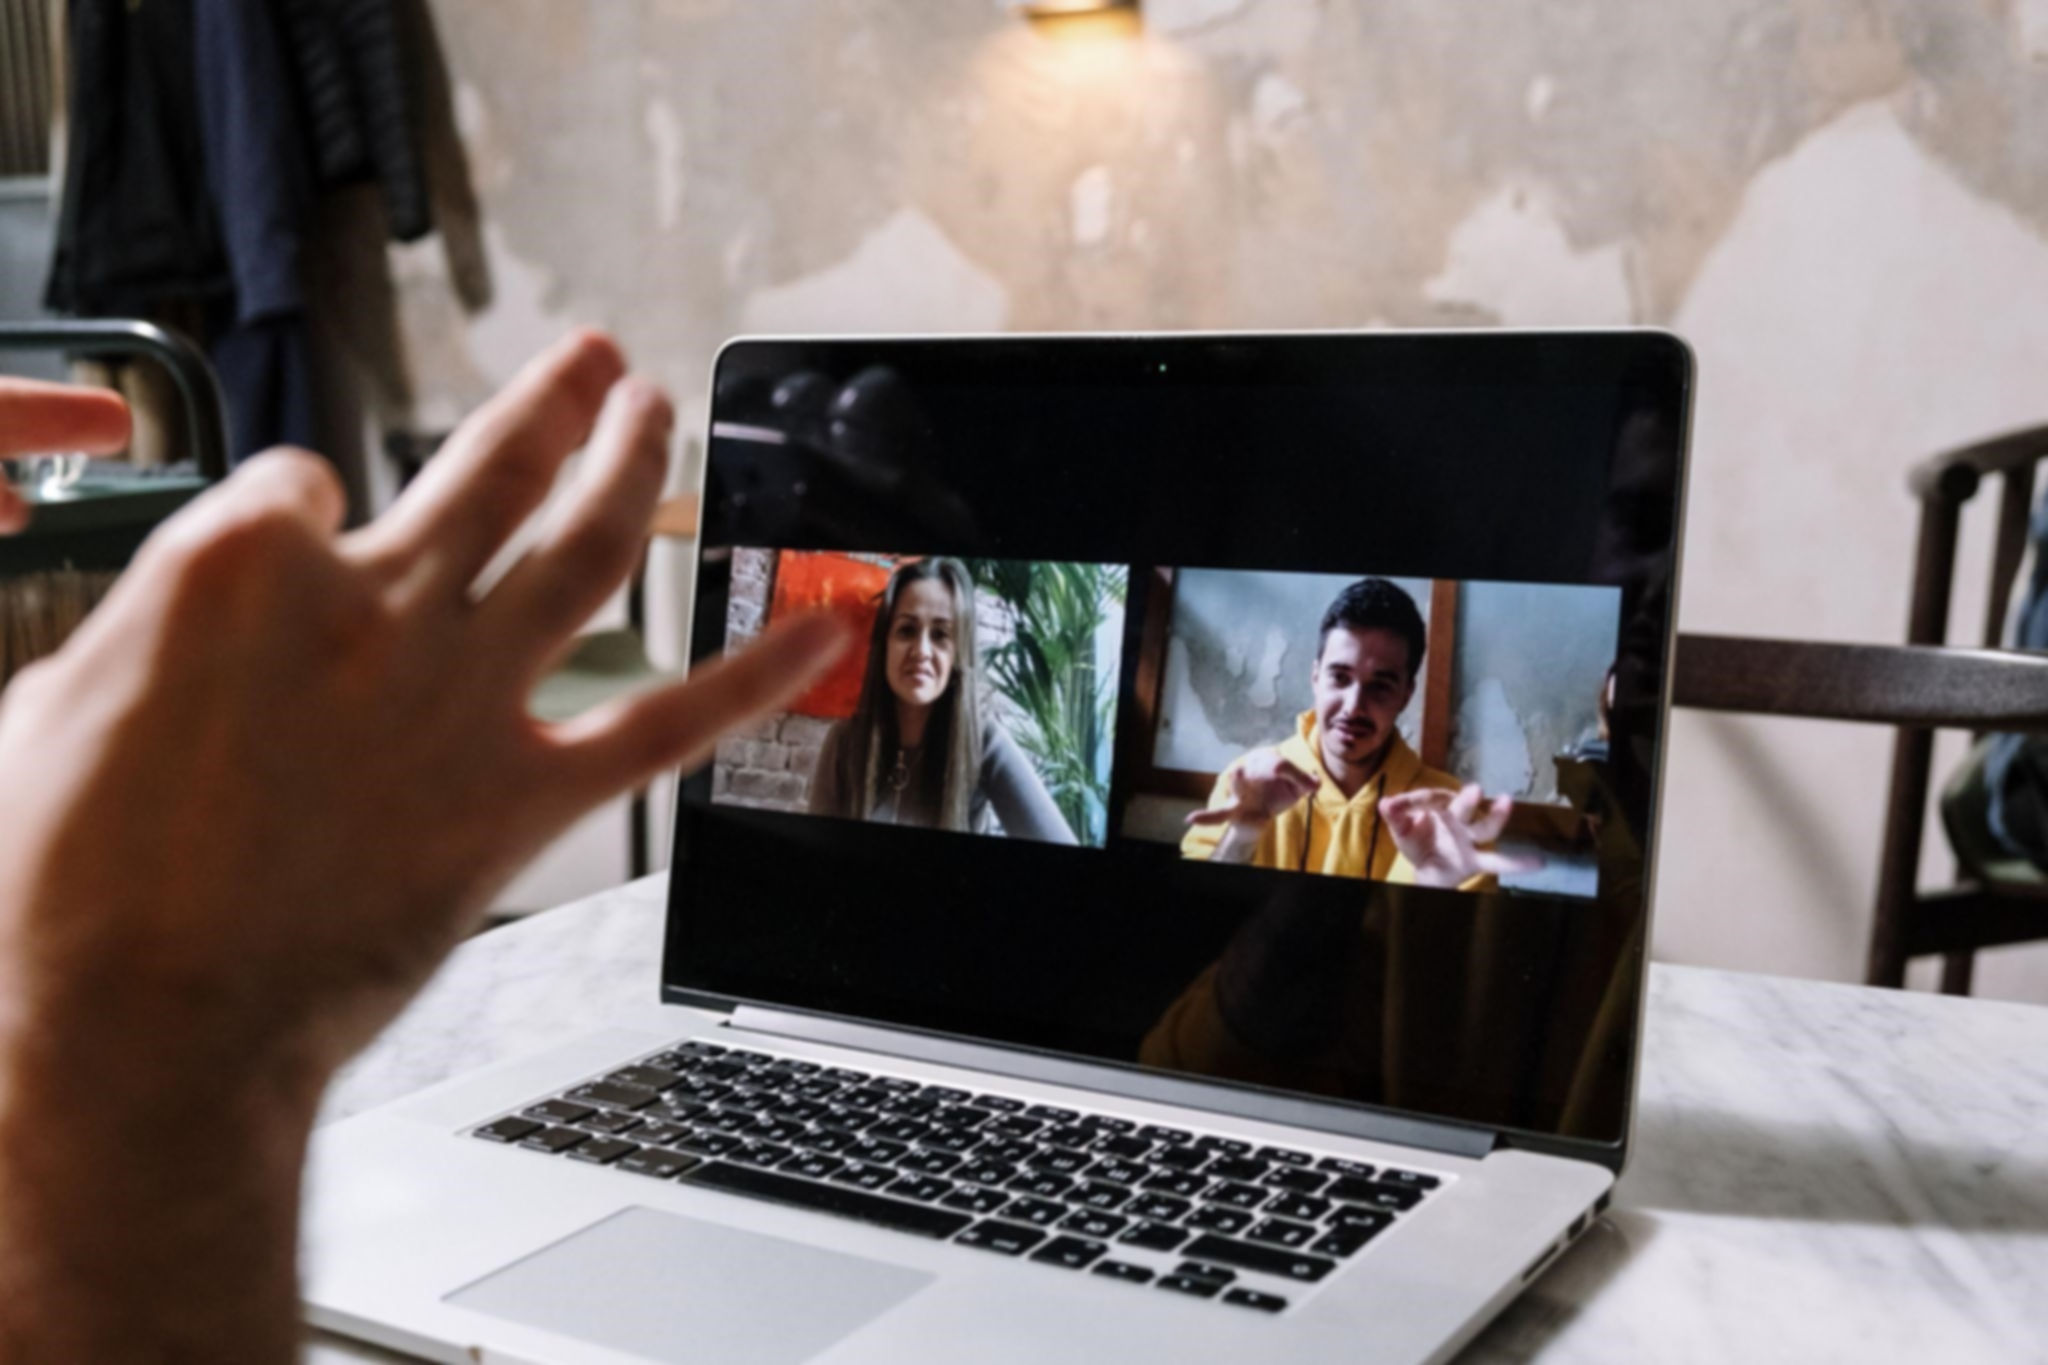
In today’s digital world, online meetings have become an essential part of our professional and personal lives. Google Meet is a popular platform that allows us to connect with colleagues, friends, and family, making it easier to collaborate and stay in touch.
One of its key features is the ability to share your screen, which can be incredibly useful for presentations, demonstrations, and collaborative work. In this article, we will walk you through the simple steps to share your screen on Google Meet, making it accessible to users of all levels of tech-savviness.
Step 1: Join or Start a Meeting
The first step is to either join an existing Google Meet meeting or start one yourself. You can do this by visiting the Google Meet website (meet.google.com) or using the Google Meet app on your smartphone or tablet.
If you’re starting a new meeting, click on “Start a Meeting,” and if you’re joining an existing one, enter the meeting code provided by the host.
Step 2: Access Meeting Controls
Once you’re in the meeting, you’ll need to access the meeting controls. Move your mouse cursor or tap your screen to make the controls visible. They will appear at the bottom of the screen or in the upper-right corner, depending on your device and settings.
Step 3: Click on the “Present Now” Button
To start sharing your screen, click on the “Present Now” button. It may have a little arrow next to it, indicating a dropdown menu. When you click on it, you’ll see several options.
I: Your Entire Screen
This option allows you to share your entire computer or device screen, including any open applications or documents.

This option lets you choose a specific window or application to share, which is handy if you only want to share one program and keep the rest of your screen private.

If you’re using Google Chrome, you can share a specific tab from your browser. This is useful for sharing webpages or online documents.
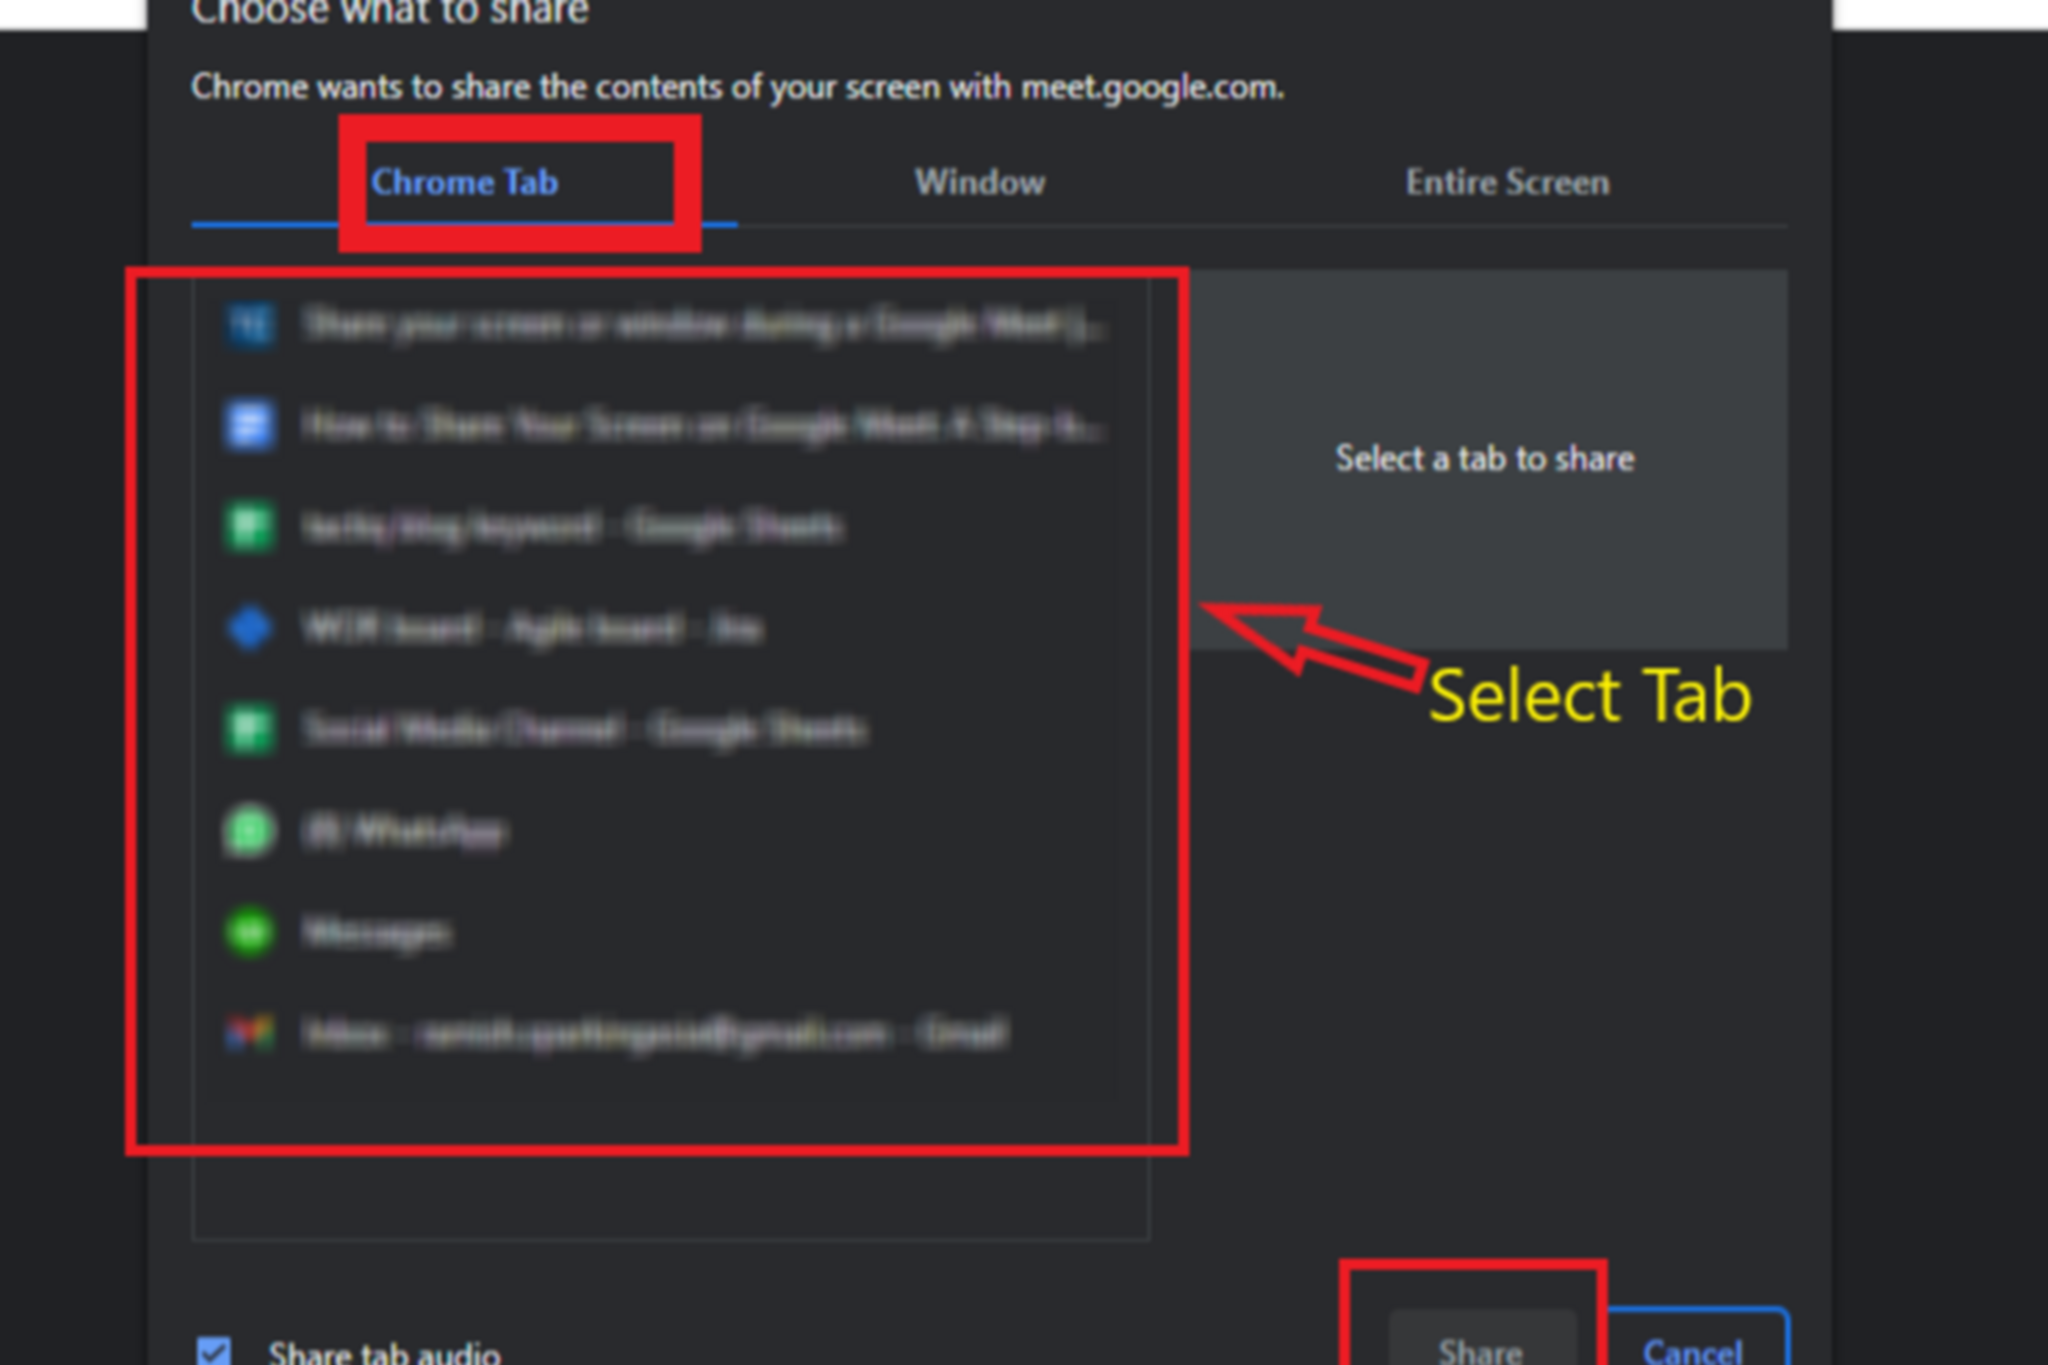
Select the option that suits your needs. For most screen sharing situations, “Your Entire Screen” is the easiest choice.
Step 4: Confirm and Share
After selecting the screen or window you want to share, click the “Share” button. You may be asked to confirm your choice. Click “Share” again to start sharing your screen with the meeting participants.
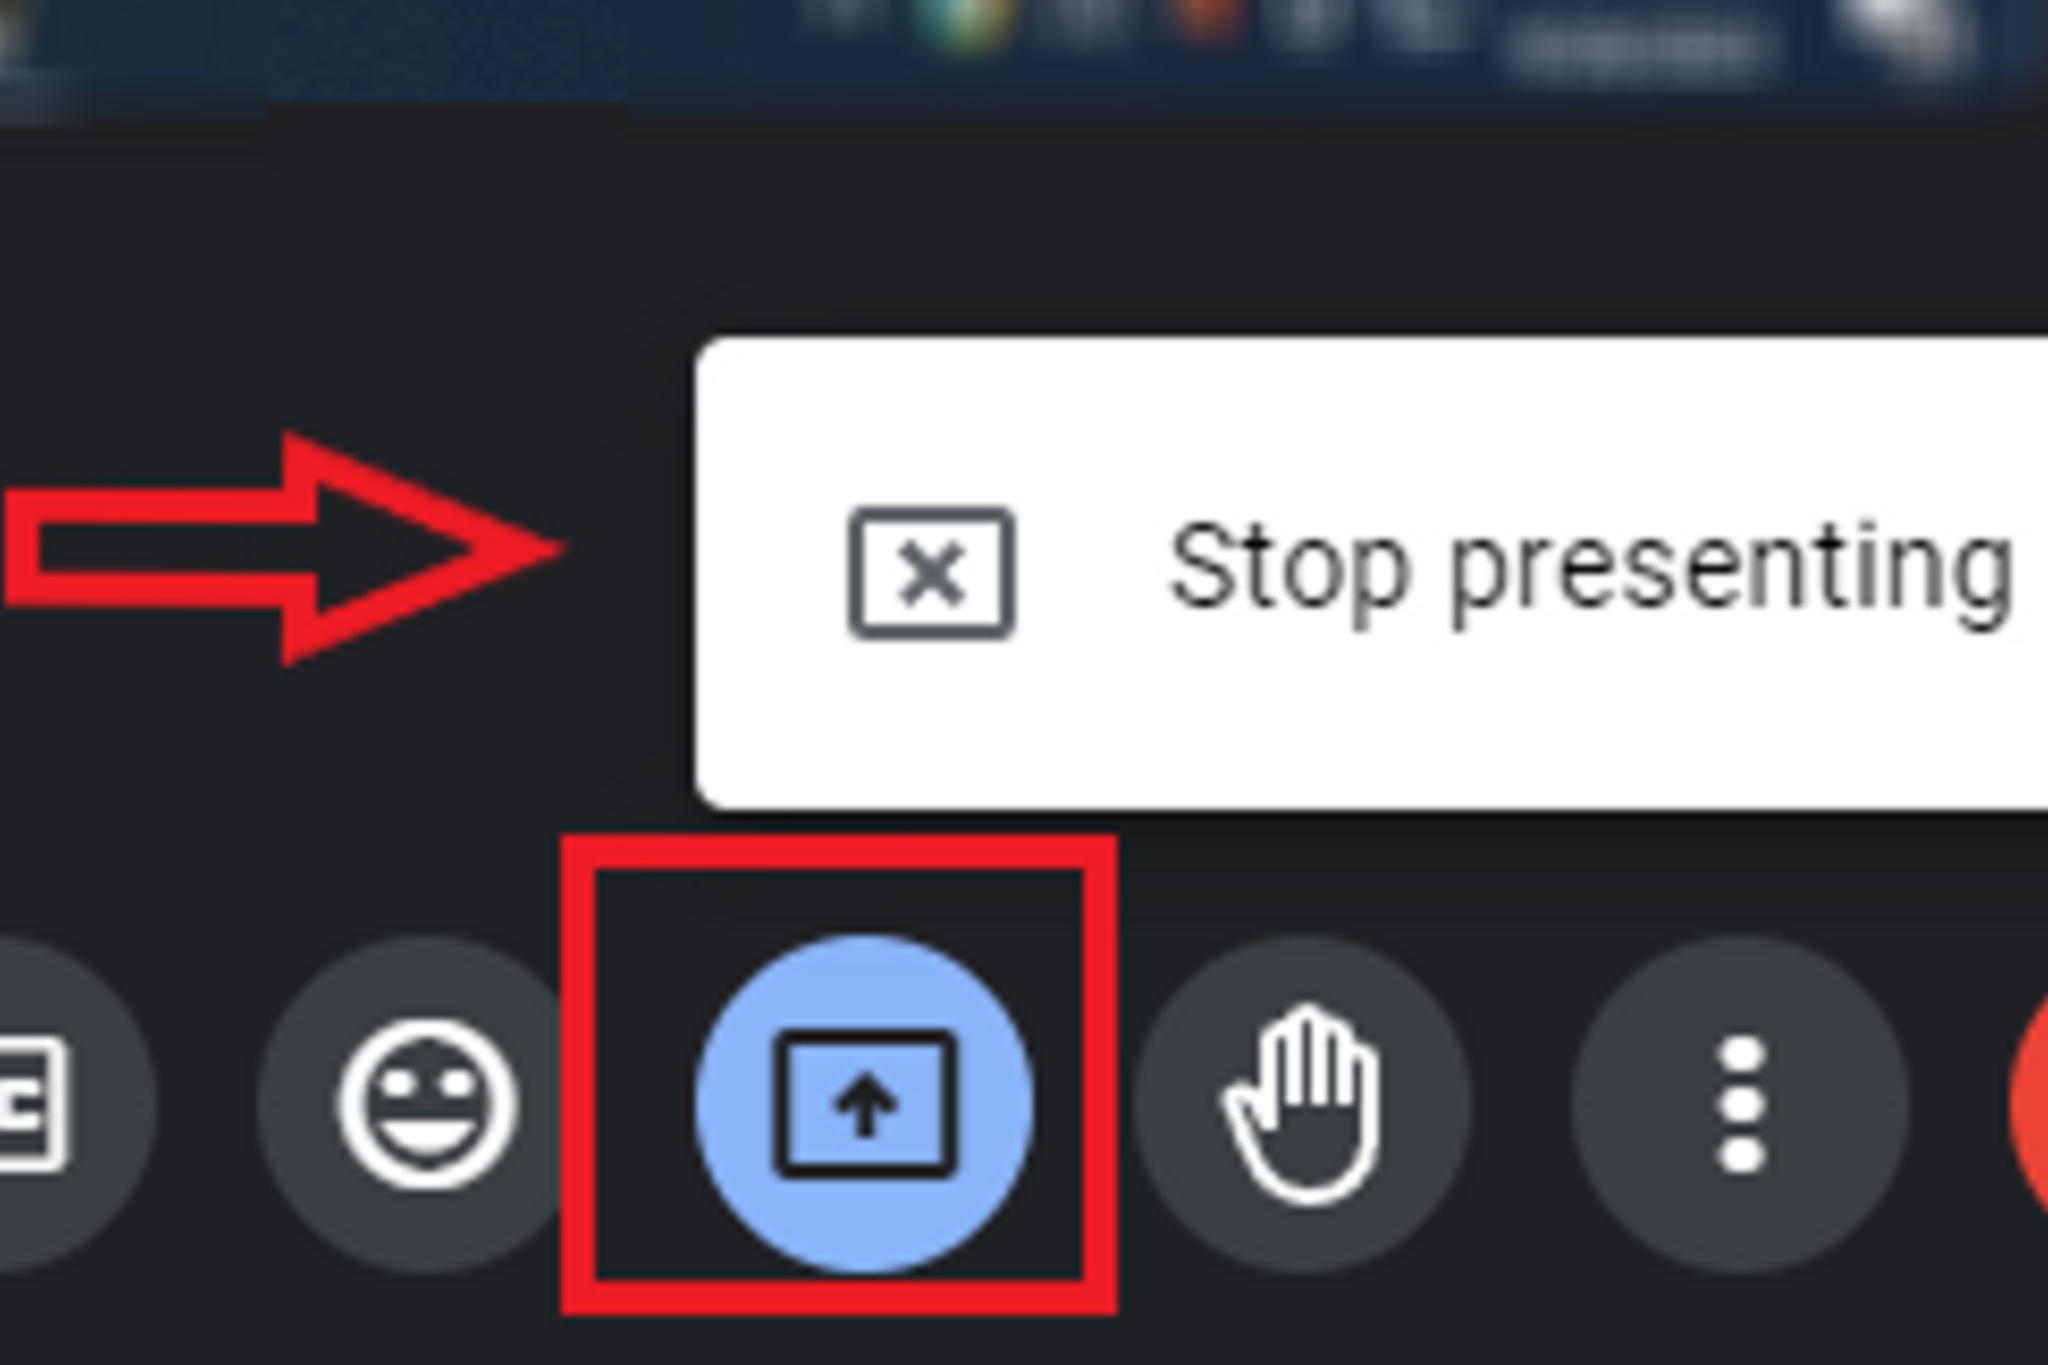
Step 5: Stop Sharing Your Screen
When you’re done sharing your screen, you can stop at any time. Simply locate the “Stop sharing” button, usually found at the bottom of the screen, and click it. This will return your meeting to the regular video conferencing mode.
Tips for a Smooth Screen Sharing Experience
Before your meeting, close any irrelevant tabs, documents, or applications to avoid sharing sensitive information accidentally.
A stable internet connection will ensure that your screen sharing is smooth and clear.
If you’re new to screen sharing, practice with a friend or colleague to familiarize yourself with the process.
While sharing your screen, communicate effectively with your meeting participants. Explain what you’re sharing and guide them through the content as needed.

In conclusion, sharing your screen on Google Meet is a straightforward process that can greatly enhance your online meetings and collaborations. Whether you’re presenting a project, giving a demonstration, or simply sharing a website, these steps will help you make the most of this valuable feature.
So, go ahead and start sharing your screen confidently in your next Google Meet meeting!